How to Train GPT-4-mini to Write Manual Test Cases from Screenshots

Manual test case creation is one of the most time-consuming and repetitive parts of the QA lifecycle. It’s also where quality often gets cut when timelines compress.
But here’s what we discovered at Snap:
By training GPT-4-mini to generate test cases from annotated screenshots, we slashed our manual test writing time; without cutting coverage.
In this article, I’ll walk you through:
- Why screenshots are the perfect test case seed
- How to annotate them for clarity
- How to fine-tune GPT-4-mini
- How to write prompts that yield reliable test cases
- How to validate and iterate
Let’s jump in!
1. The Use Case: From Screenshot to Test Case
Manual test case writing usually starts with a human reviewing UI designs or staging builds, then:
- Describing UI state and interactions
- Documenting each step a user would take
- Writing expected results
That process is slow. But what’s always available early in the dev cycle?
✅ Screenshots of the UI
And screenshots carry everything: layout, labels, inputs, and states.
If we can train an AI to understand those, we can turn them into repeatable, structured test steps.
2. Step-by-Step: Annotating Your Screenshots
Don’t throw raw images at the model. Guide it.
a) Tools to Use:
- Snagit
- Markup Hero
- Even simple tools like Preview on Mac or Windows Snip & Sketch
b) What to Annotate:
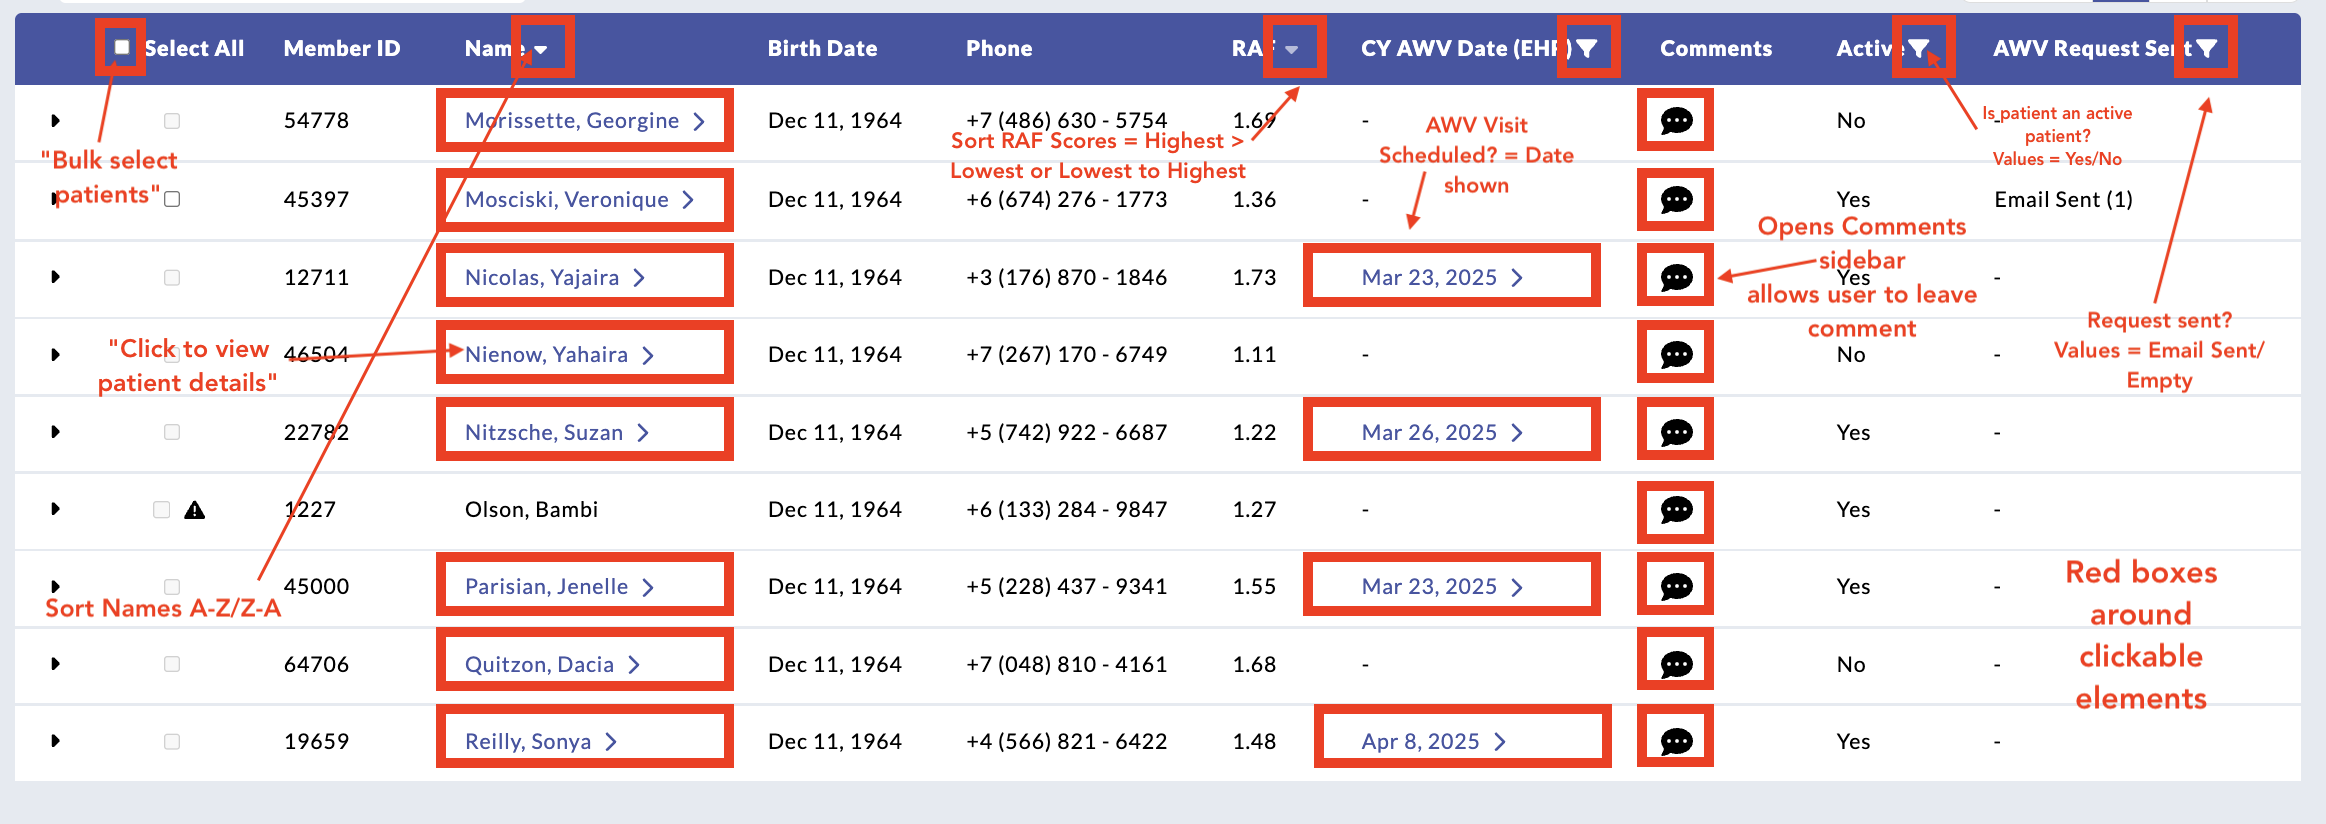
- Draw red boxes around clickable elements (buttons, links)
- Add numbered callouts for input fields or form sections
- Label error messages or empty-state UI clearly
- Annotate success messages, popups, and confirmations
The cleaner the screenshot, the better the output.

Folder Example:
/test-case-images/
 └── onboarding/
     ├── 01-welcome.png
     ├── 02-details-filled.png
     └── 03-success-modal.png
3. Build Your Training Dataset
Now let’s pair those screenshots with actual test case examples.
Structure of Each Entry (for fine-tuning):
You’ll create JSONL entries with:
- Prompt: File name or image reference + instruction
- Completion: Properly formatted manual test case
Example:
{
  "prompt": "Screenshot: onboarding/02-details-filled.png\nInstruction: Write a manual test case for this screen.",
  "completion": "### Onboarding > Enter Details > Required Fields\n\n**Precondition:** User is on the details entry screen.\n\n**Steps:**\n1. Enter First Name and Last Name.\n2. Leave 'Date of Birth' empty.\n3. Click 'Next'.\n\n**Expected Result:** Error message appears for missing Date of Birth."
}
💡 Target Size: Start with 100–150 examples across varied UI screens.
💡 Pro tip: Mix happy paths, edge cases, and error validations.
4. Fine-Tune GPT-4-mini
Once you have your dataset:
a) Format as .jsonl
Ensure each line is a prompt/completion pair like shown above.
b) Upload & Fine-Tune via OpenAI CLI
openai api fine_tunes.create \
  -t testcases.jsonl \
  -m gpt-4o-mini \
  --n_epochs 4 \
  --learning_rate_multiplier 0.1
Wait ~10 minutes. You’ll get a fine_tuned_model ID.
5. Prompt Engineering for Screenshot-Based Test Cases
Now it’s time to use it.
Prompt Template:
Screenshot: https://cdn.company.com/screenshots/onboarding/02-details-filled.png
Instruction: Generate a manual test case for the above screen.
Or if you’re using system instructions:
system_prompt = "You are a senior QA engineer. Generate clear, step-by-step manual test cases from UI screenshots."
Inference Tips:
- temperature: 0.2 (reduces randomness)
- top_p: 0.95
- max_tokens: 500
6. Python Script to Run It All
import openai

def generate_test_case(image_url, title):
    prompt = f"Screenshot: {image_url}\nInstruction: Write a manual test case titled '{title}'."
    response = openai.ChatCompletion.create(
        model="gpt-4o-mini:ft-your-org-2025-07-31",
        messages=[{"role": "user", "content": prompt}],
        temperature=0.2
    )
    return response.choices[0].message.content

# Example usage
tc = generate_test_case(
    "https://cdn.snapqa.com/screenshots/onboarding/02-details-filled.png",
    "Onboarding > Required Field Validation"
)
print(tc)
7. Validate the Output
AI test cases should still be reviewed.
Review Checklist:
- Are the steps sequential and specific?
- Is the expected result clear and testable?
- Is it consistent with UI behavior?
- Does it follow your team’s formatting?
Every 1–2 weeks, feed reviewed cases back into your fine-tune dataset to improve future output.
8. Bonus: Automate Screenshot-to-Test Workflow
Integrate into your CI/CD or test case management system.
- Auto-capture screenshots from staging builds
- Push them to a queue or folder
- Run them through GPT-4-mini to generate initial test cases
- Send drafts to QA for final sign-off
You’re not replacing testers. You’re giving them superpowers.
Why Use GPT-4-mini Instead of GPT-4o?
GPT-4o is more powerful overall, but GPT-4-mini has key advantages for structured automation tasks like test case generation:
1. Cost-Efficient for High Volume
- If you're generating 50–500 test cases at a time (e.g., from Figma flows or screenshot batches), GPT-4o’s token cost adds up fast
- GPT-4-mini is cheaper, making it ideal for:
- Daily test case generation
- CI-integrated workflows
- Ongoing fine-tuning and iteration
2. Faster and Lighter
- GPT-4-mini responds faster, especially for short, structured completions like test steps and expected results
- It’s more practical for CLI tools, batch scripts, and CI jobs where latency matters
3. Easy to Fine-Tune
- As of today, OpenAI only supports fine-tuning on GPT-3.5-turbo and GPT-4-mini, not GPT-4o
- That means if you want to teach your model:
- Your product’s UI structure
- Domain-specific language
- Your preferred formatting
…then GPT-4-mini is the model you can actually shape
4. More Predictable Output for Repeatable Tasks
- GPT-4o is brilliant but sometimes too “creative”
- GPT-4-mini, especially when fine-tuned, sticks to your format reliably:
Precondition → Steps → Expected Result - That’s exactly what you want in a QA workflow
Final Thoughts
In a world where speed is everything, your test case creation process can’t afford to be manual forever.
With GPT-4-mini:
- You get fast, consistent output
- You reduce grunt work
- You keep quality high; even under pressure
The future of QA isn’t “more testing.”
It’s smarter testing. Augmented by AI. Driven by judgment.
👉 Want more posts like this? Subscribe and get the next one straight to your inbox. Subscribe to the Blog or Follow me on LinkedIn
Comments ()